To start, login to your website and ensure you have the required access to Secure Pages.
Secure Pages can only be seen by certain individuals or groups of people and their content is confidential; therefore it is important to ensure their security is not compromised by handling them appropriately.
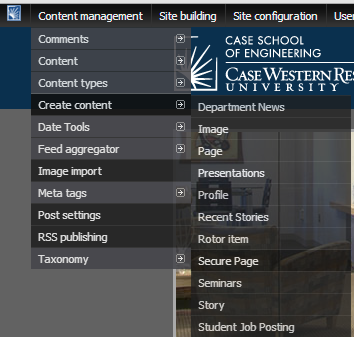
You can create a new Secure Page under Content Management -> Create Content, shown below:
Secure Pages work a lot like normal pages but have some distinct differences that will be covered in this tutorial. For information on how to create pages in general, please see the documentation section of the Case IT website.
The first thing to note is that Secure Pages should be placed under the appropriate menu, which should already be created, as shown below.
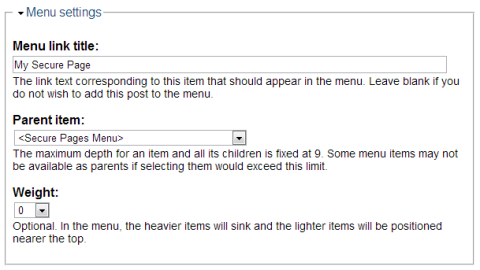
As long as it’s under the Secure Pages Menu or one of its pages, it is fine.
One of the main features of secure pages is the ability to upload files that can only be accessed by certain people. This is a great way of securely sharing files and must be done through the section called “File Attachments”, as shown below.
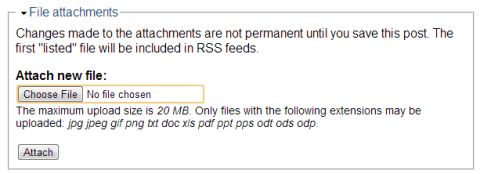
Attaching a file to the page works much like an e-mail. Begin by clicking “Choose File” (or “Browse…” or something of the sort, depending on your browser) and navigating to the file you wish to upload, such as “My Confidential File.pdf”.
Then click “attach” to add it to the list of files. Once uploaded, your file will be added to the list of secure files, like in the example below:
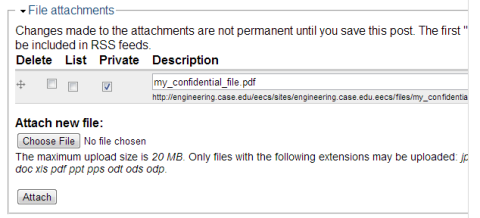
Each file will have its own row. The order can be changed by dragging the icon to the far left ( ) up or down. Checking the first checkbox will cause the file to be deleted upon saving the page. The second checkbox, “List”, controls whether or not the file will be listed when viewing the page—this is only useful if you want the file there, but not temporarily inaccessible for some reason. Lastly, “Private” should always be checked as it ensures the file is, in fact, secure/private.
The description can simply be the name of the file or a small description of what it is or who it is for.
Once you’re done adding files, you may optionally turn comments on or off under “Comment Settings”.
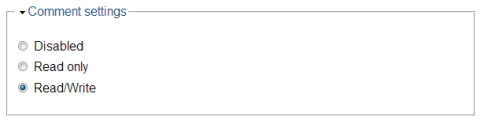
Disabled means comments cannot be read or written; read only means comments can only be read (so if there are no comments to start with, this is somewhat redundant), and read/write means comments can be both written and read by people with access to the page.
Finally, you may preview and save the page you have created.
Just like with normal pages, if you have access to the page, you may edit it. Keep in mind that administrators decide who has what kind of access to which pages through the Access Control tab of each page and that a user may have permission to view a page but not edit it or its contents.